Deploying Sofa to Outlook
Files in Microsoft Outlook can be signed using the SignPoint process, which can be made available using the Sofa extension – Sofa 365 Bridge (for Outlook).
| This document has been prepared in the test environment and the extension name is therefore Sofa 365 Bridge-TEST, the installation procedure and usage is identical with other Sofa versions. |
Running the app deployment wizard
To deploy the Sofa app for signing in Microsoft Outlook, open Microsoft 365 admin center in your browser. The address is: https://admin.microsoft.com/
On the left in the admin center window, select Settings. If the option is not visible, select Show all first.
A sub-menu is displayed. Select Integrated apps.
To deploy a new app, open the tab Deployed apps and select Upload custom apps.
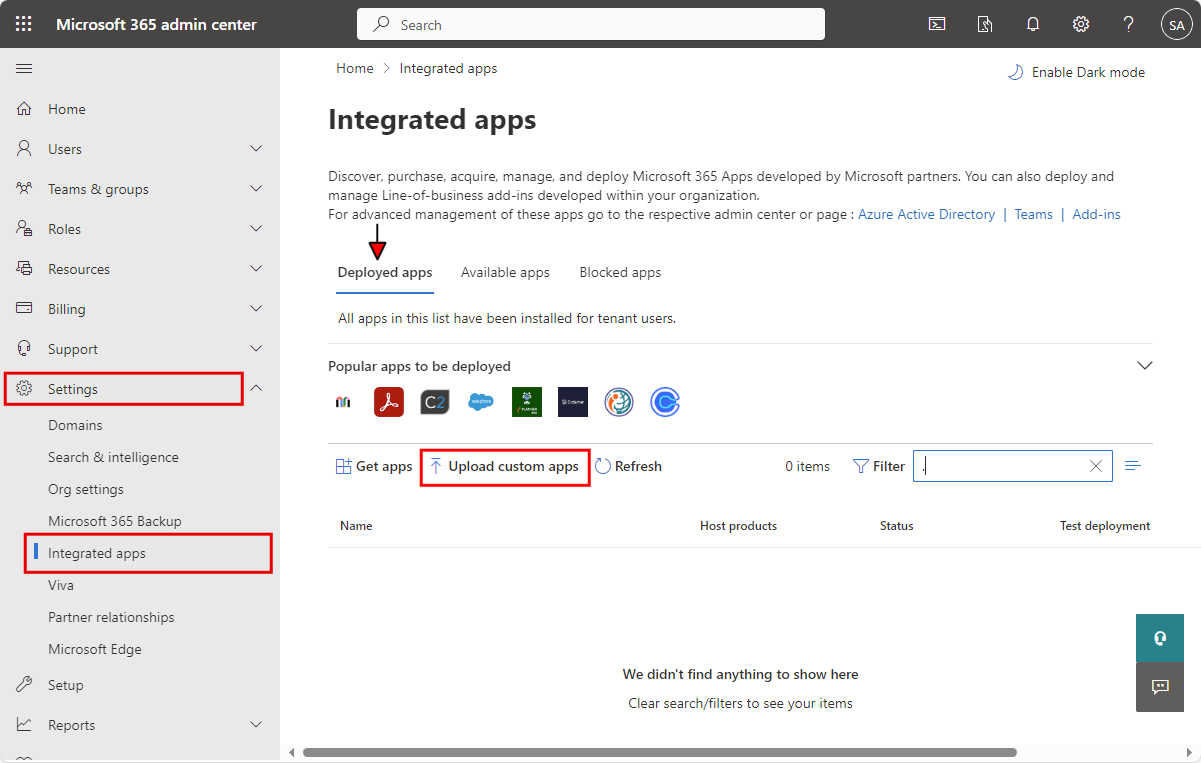
A wizard opens to guide you through the deployment of a new app. The setup is divided into several tabs.
Selecting the app manifest file
Upload a file with the "app manifest" on the first tab – Upload own apps. Do the following:
-
In App type, select Office Add-in.
-
In Choose how to upload app, specify how to upload the app manifest file and where from. There are two options:
-
Upload manifest file (.xml) from device – select this option if you have a manifest file stored on your computer drive as a .xml file. Select Choose file to look up the file in the Upload file dialog.
-
Provide link to manifest file – select this option if the manifest file is available on the web using a URL address. Copy the link to file in the field and select Verify.
-
The links to manifest files are the following, based on the Sofa environment type:
-
For the Sofa test environment:
https://testsofa.602.cz/bridge/0579924c-bf6d-4c99-b993-1f12588b9f99/manifest.xml -
For the production version of Sofa:
https://sofa.602.cz/bridge/3cd643a0-42eb-4445-aef6-bbce26e6d09f/manifest.xml
This example will use the test environment. When you select Verify, the manifest file is uploaded and checked.
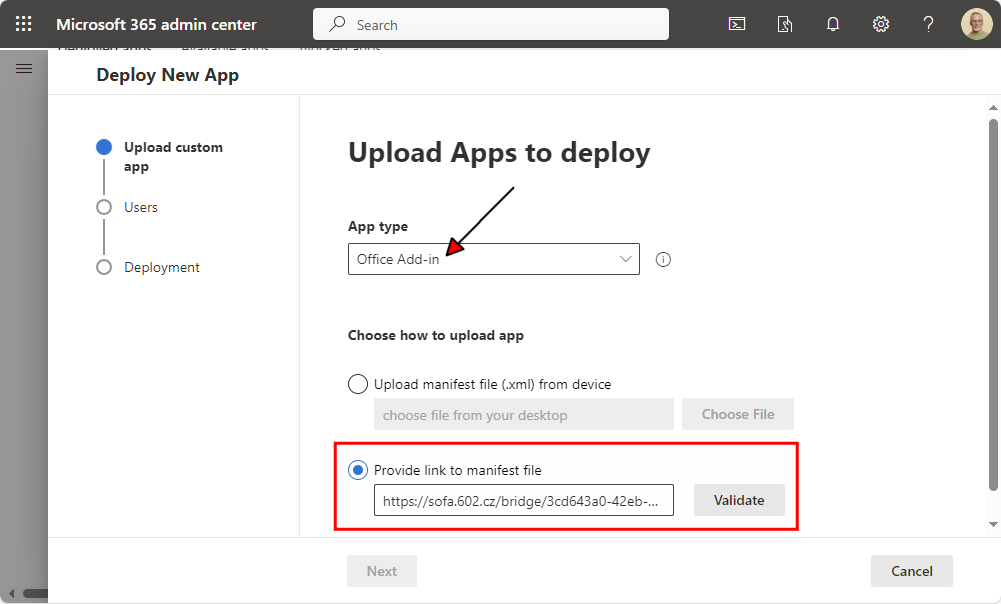
If the check is successful, the message Manifest file validated is displayed in green.

Otherwise, an error message is displayed in red and the process cannot continue.

Select Next in the lower left corner to continue to the next tab.
Selecting users to access the Sofa app
On the second tab, Users, select the users of your organization to get access to the app in Outlook. There are three options for the Assign users switch:
-
Just me (…) – the app will only be available to you, the user logged in using the name given in the brackets.
-
Entire organization – the app will be available to all users in your organization.
-
Specific users/groups – the app will be available to selected users and groups. The field below this option can be used to select the users and groups.
Select Entire organization.
Keep the field Is this a test deployment? switched to No. In a test deployment, you might encounter e.g. a limit in the number of users.
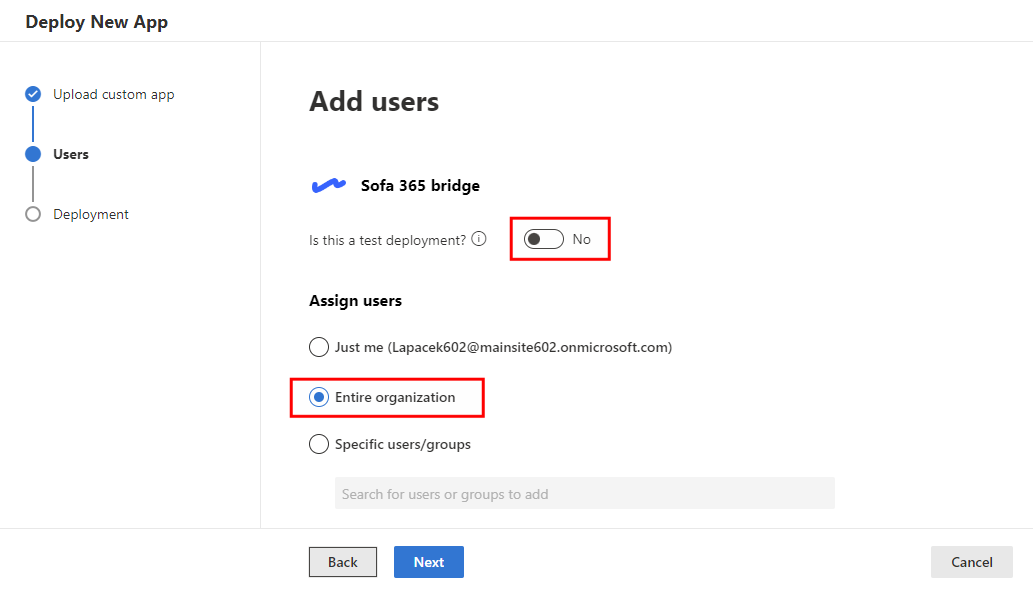
Select Next to continue to the next tab.
More options
The third tab, Deployment, is divided to two sub-tabs: Permissions and Finish.
Setting up permissions
On the Permissions sub-tab, approve the permissions to grant to the newly installed app. They are the following permissions:
-
Allows the app to read all files the signed-in user can access.
-
Allows users to sign in to the app with their work or school accounts and allows the app to see basic user profile information.
-
Allows the app to display your users' basic profile (e.g., name, picture, user name, email address).
-
Allows users to sign in to the app, and allows the app to read the profile of signed-in users. It also allows the app to read basic company information of signed-in users.
| You can use the arrow symbol to hide or expand details listed in the lower half of the tab. |
On the tab, select Accept permissions.
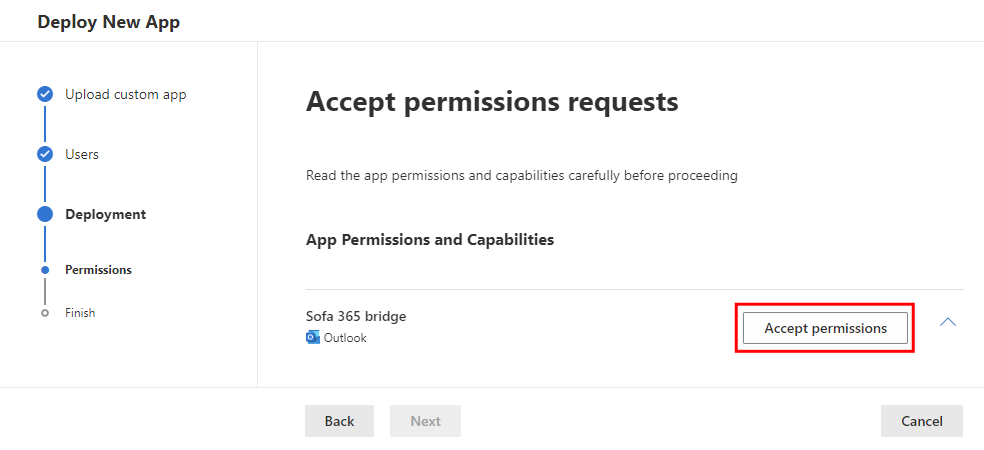
You will also probably need to select and confirm your Microsoft account.
The dialog Permissions requested is then displayed with information and links for the permissions to be granted. Section This app would like to lists operations you need accept permission to in this dialog so that the app can work correctly. The list varies based on the specific app.
Select Accept to accept all listed permissions.
Granting the permissions is noted on the Permissions tab with the message Permissions accepted.

Select Next to continue to the last tab of the wizard.
Finish deployment
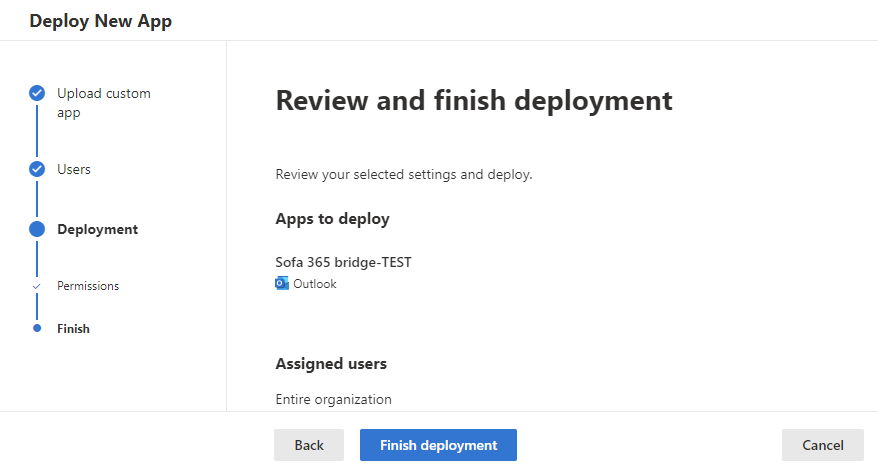
The app deployment ends on the last tab, Finish.
The tab displays an overview of app settings:
-
Section Apps to deploy specifies that the app will run in Outlook.
-
Section Assigned users shows that the app will be available to all users in your organization.
Select Finish deployment to deploy the app.
A successful app deployment is announced by the message Deployment completed with a green indicator.
Note that it may take up to six hours before the app is available in Outlook.
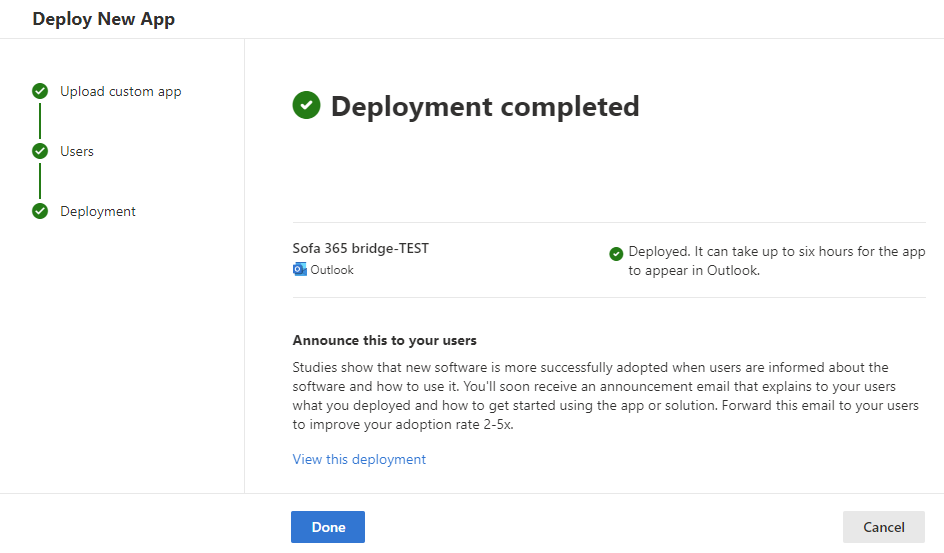
Select Done to complete deploying the app. You will return to the Integrated apps window, where the freshly deployed app is listed on the Deployed apps tab.


